
Mixmax started out as a monolithic Meteor application hosted on Modulus.io. As our traffic and user base grew we ran into problems with both Meteor itself and our hosting provider, prompting us to factor subsystems into their own microservices and move those services to AWS Elastic Beanstalk. This reduced our costs and gave us better operational control. In particular, it let us lock down our services at the network level, using an AWS VPC.
Our Meteor application, however, remained outside Elastic Beanstalk. This left our architecture vulnerable, as any resource needed by the Meteor app (databases, other services) had to be exposed outside the VPC. But Meteor relies on websockets, which AWS did not natively support — until now, with the advent of the Application Load Balancer (ALB). In this post, we describe:
- approaches to supporting websockets on AWS pre-ALB, and their limitations
- how to configure an ALB and websockets for use with Elastic Beanstalk and AWS VPCs
- how to easily deploy Meteor to Elastic Beanstalk
Much of this post is relevant to any websocket-using application on Elastic Beanstalk, not just Meteor applications. We highlight where this isn’t the case below.
Supporting Websockets on AWS Pre-ALB
Prior to the release of the ALB, the one and only AWS-native option for load balancing was the venerable Elastic Load Balancer (now called a Classic Load Balancer). You could install any load balancer you liked on your own EC2 instance—and we’ll get into that below—but if you wanted AWS to handle high availability, automatic scaling, and security, it was the ELB or bust.
The problem is that the ELB doesn’t support websockets. There are plenty of articles about load balancing websockets with an ELB, but in all of those configurations the ELB is not actually balancing websockets per se — it’s balancing raw TCP connections, and letting an application proxy server like nginx handle the HTTP upgrade request at the start of the websocket connection.
However, websockets can’t be effectively load-balanced by a “TCP-mode” ELB (an ELB listening to TCP connections on port 80, rather than HTTP connections). This is because many users can’t actually use websockets, due to using old browsers or being in environments that don’t support the WebSocket protocol, like corporate networks with restrictive proxies. So what many applications including ours use is a websocket emulation like SockJS. If websockets are not available, the emulation falls back to polling using XHR or JSONP.
Unfortunately, a TCP-mode ELB can’t reliably load-balance these fallback transports. This is because these transports rely on firing several requests during the lifetime of a “socket”, all of which need to be served by the same process. There are two common ways to implement such “sticky sessions”:
- IP-based affinity: direct all requests from the same client IP address to the same server
- cookie-based affinity: direct all requests with the same cookie to the same server
The same corporate networks that force the use of SockJS also break IP-based affinity by load-balancing traffic across multiple external IP addresses, so you want to use cookie-based affinity. But cookies are sent as HTTP headers… and a TCP-mode ELB can’t read HTTP headers.
The ELB makes you choose between network-level and application-level balancing (TCP vs. HTTP modes, Layers 4 and 7 in the OSI model); websockets are only supported in TCP mode, and cookie-based sticky sessions are only supported in HTTP mode. In a world where websockets aren’t universally supported, this means that websockets aren’t supported at all.
At this point, others have coped by pairing a TCP-mode ELB with their own proxy server, where the latter sets and reads the session cookie. But this requires a lot more configuration. It also sacrifices Elastic Beanstalk’s guarantees of high availability and autoscaling, by intermediating AWS’ load balancer and the EC2 instances.
Wouldn’t it be nice if AWS offered a load balancer that supported cookie-based sticky sessions and websockets?
Configuring an ALB and websockets for use with Elastic Beanstalk
This is where the Application Load Balancer comes in. It load-balances at Layer 7, so supports cookie-based sticky sessions; and it supports the WebSocket protocol.
So enabling websockets on Elastic Beanstalk is as simple as clicking “Create New Environment” and selecting an Application Load Balancer, right? Well, no. As of this writing (10/16/2016), the Elastic Beanstalk GUI offers very poor support for creating and managing an ALB. This is true even for the new UI that EB is beta-testing.
Thankfully, the AWS EB CLI lets you choose an ALB during EB environment creation. You can then configure the ALB and related resources through a combination of various AWS dashboards and ebextensions scripts.
Setting up the ALB
This section applies to any use of an ALB with Elastic Beanstalk.
Assuming you’ve initialized the AWS EB CLI, create a new environment (you can’t modify an existing, ELB-using environment to use an ALB, sadly):
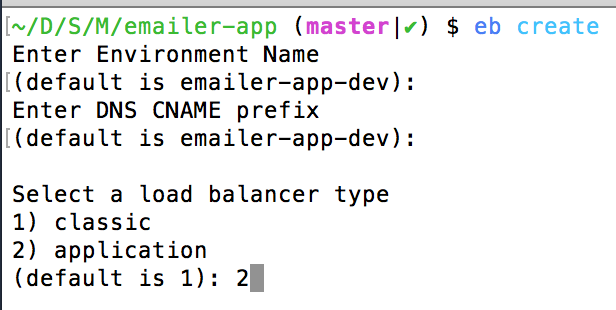
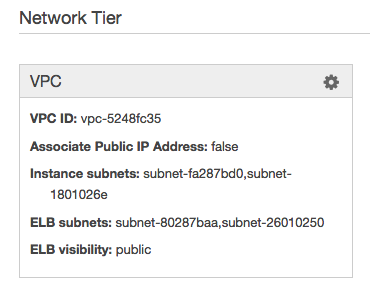
If you want to put the environment in a VPC, you’ll also need to configure that at this time by passing the --vpc flag to eb create. EB will prompt you to create security groups for the ALB and the EC2 instances but you can ignore that, as it’ll create its own. You will need to manually create subnets, and will need at least two for an ALB. You will be able to change/add subnets later in the EB dashboard; the normal UI will appear for that:
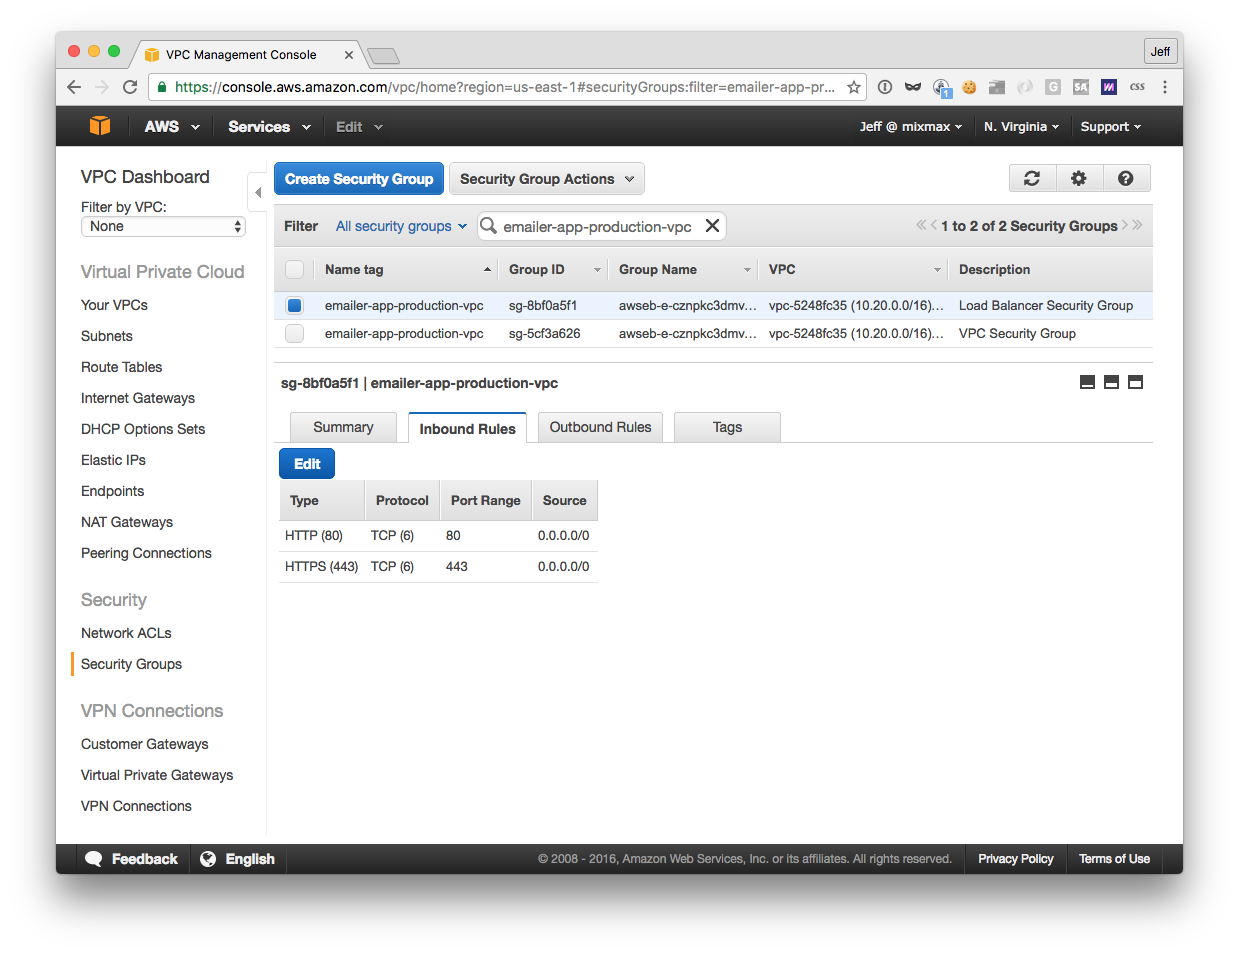
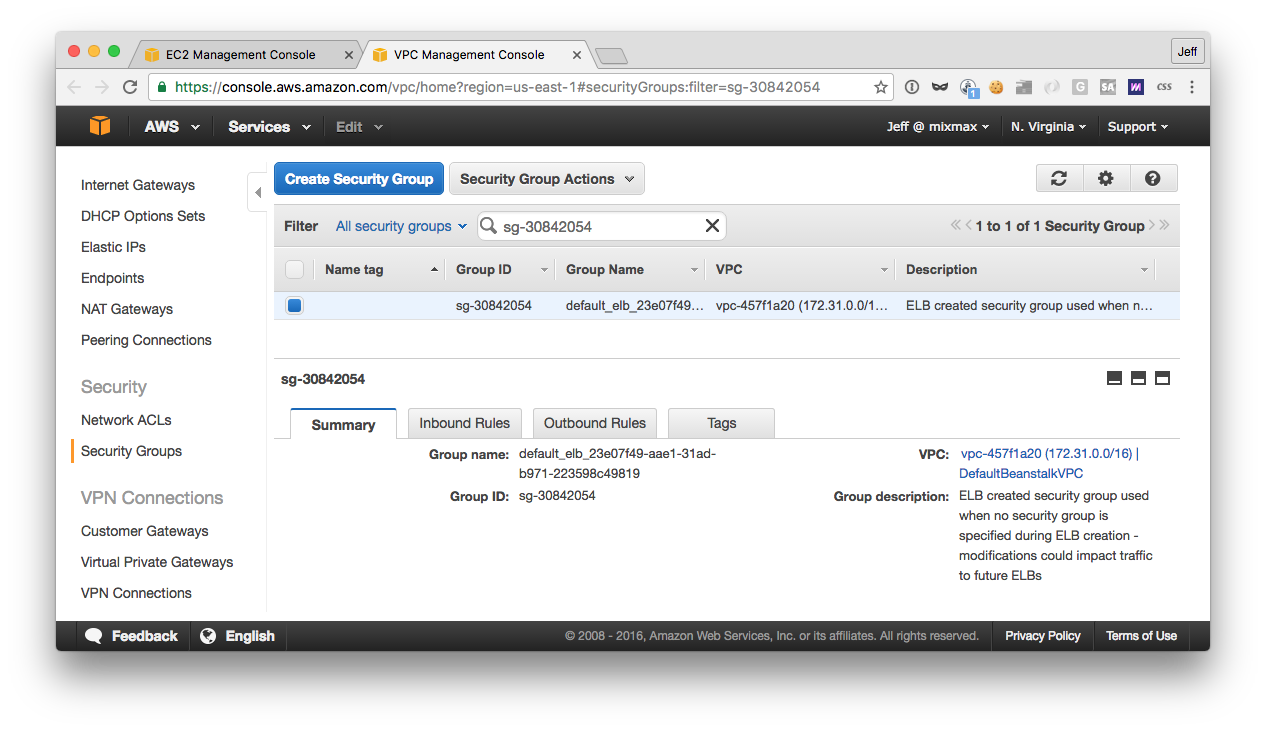
If you wish to enable HTTPS, you’ll need to add an HTTPS inbound rule to your load balancer security group. If you configured a VPC, EB will have created a security group for the load balancer and named it after the environment:
Otherwise, it will have used a default group:
To avoid modifying other resources (per AWS’ warning), you’ll want to create your own security group and associate it with the ALB:
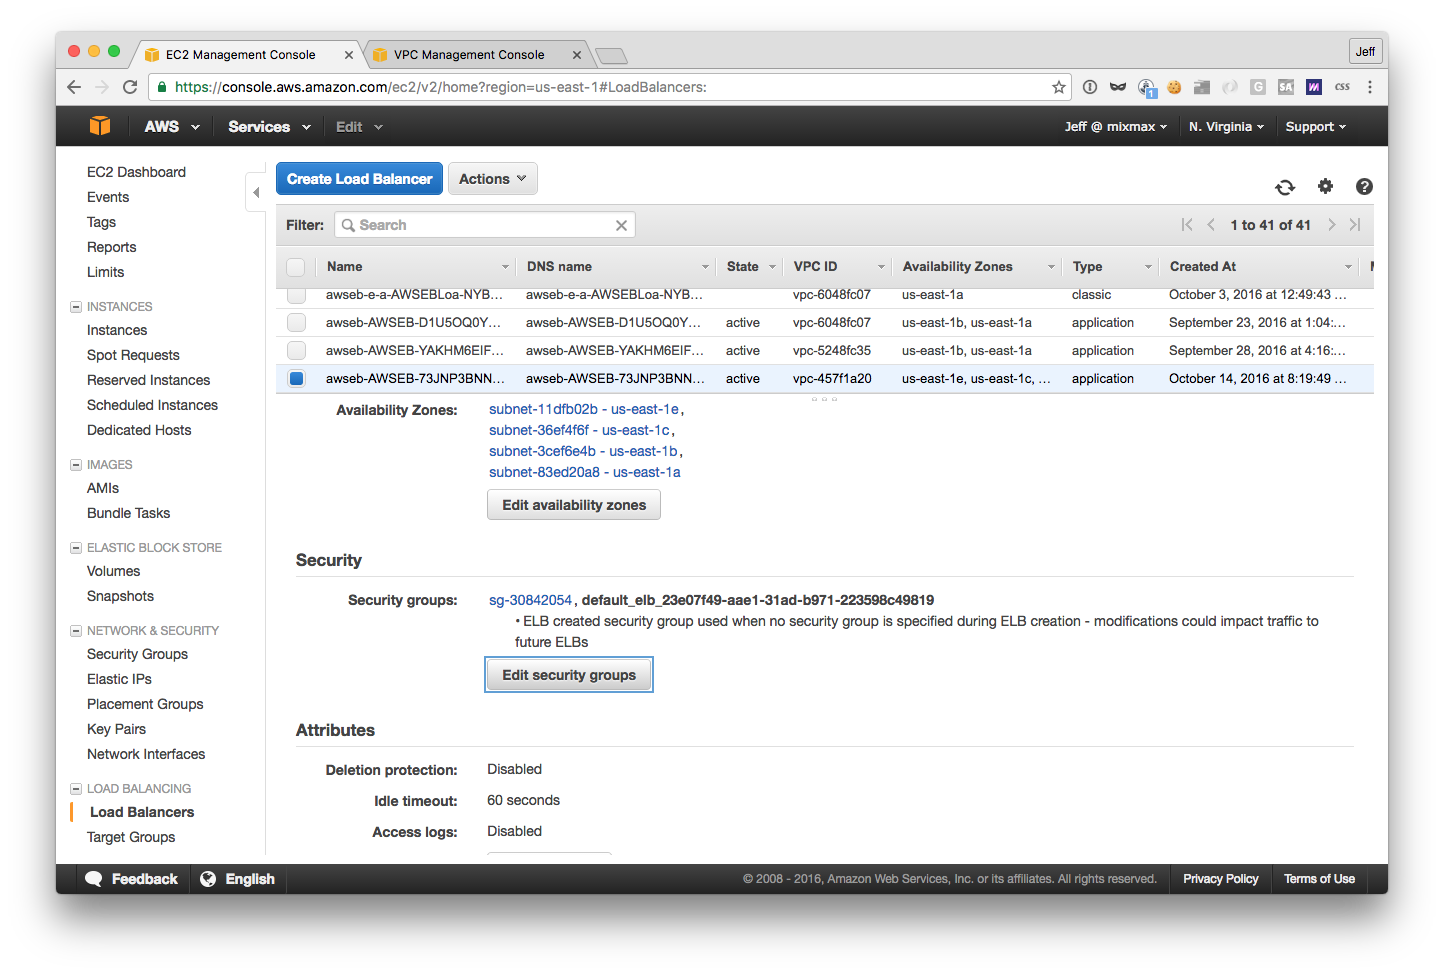
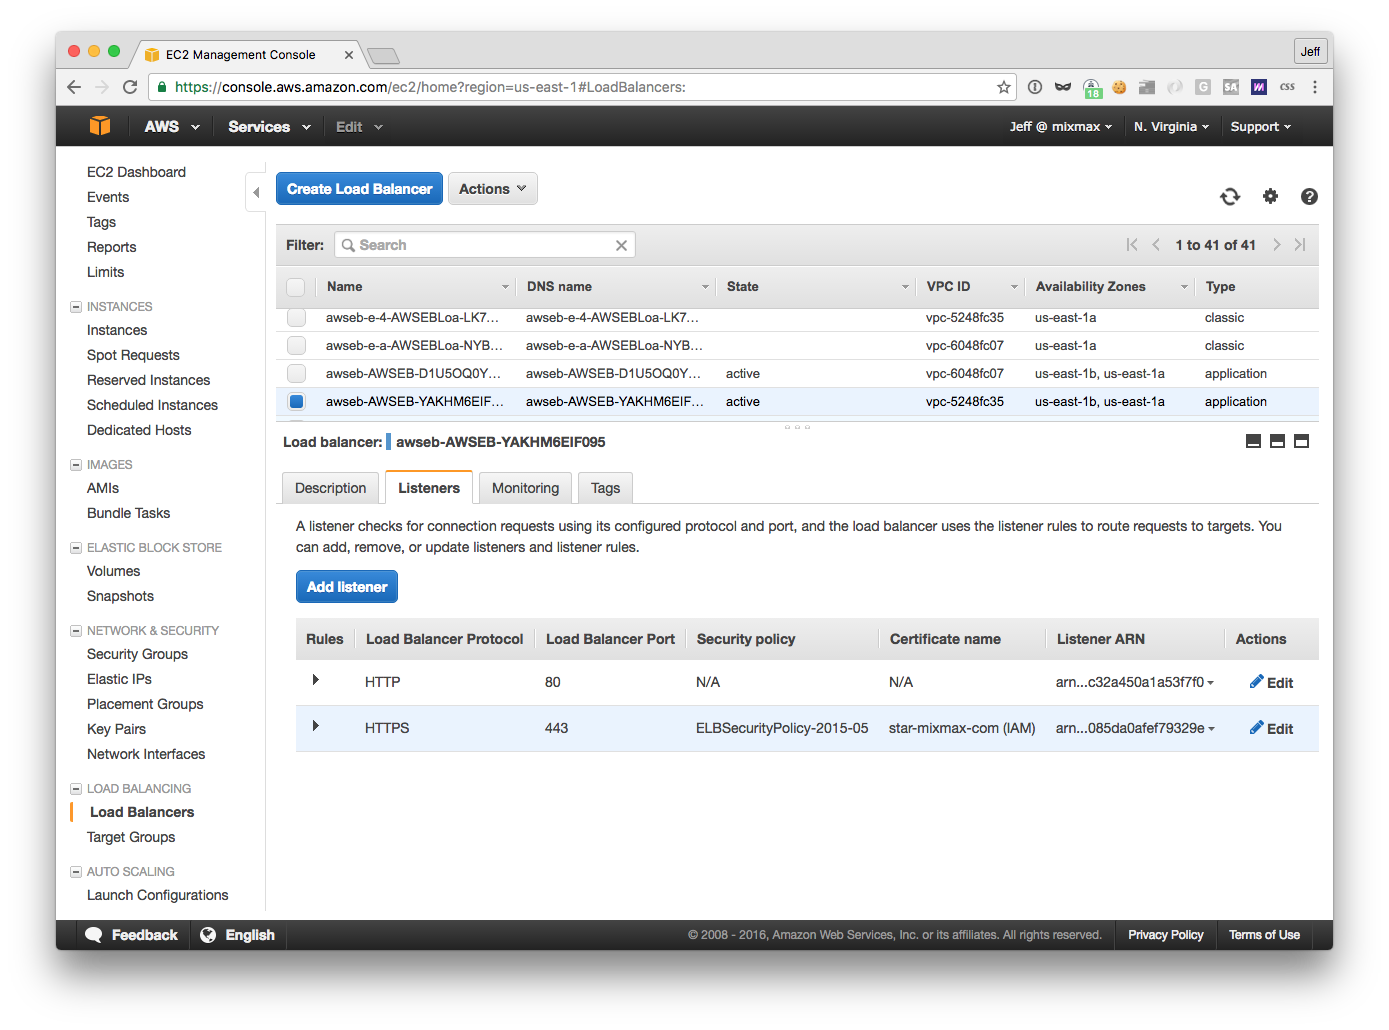
This brings us to finding the ALB, because you’ll be editing its settings in the EC2 dashboard — again, EB does not currently (as of 10/16/2016) show load balancer settings in the EB dashboard.
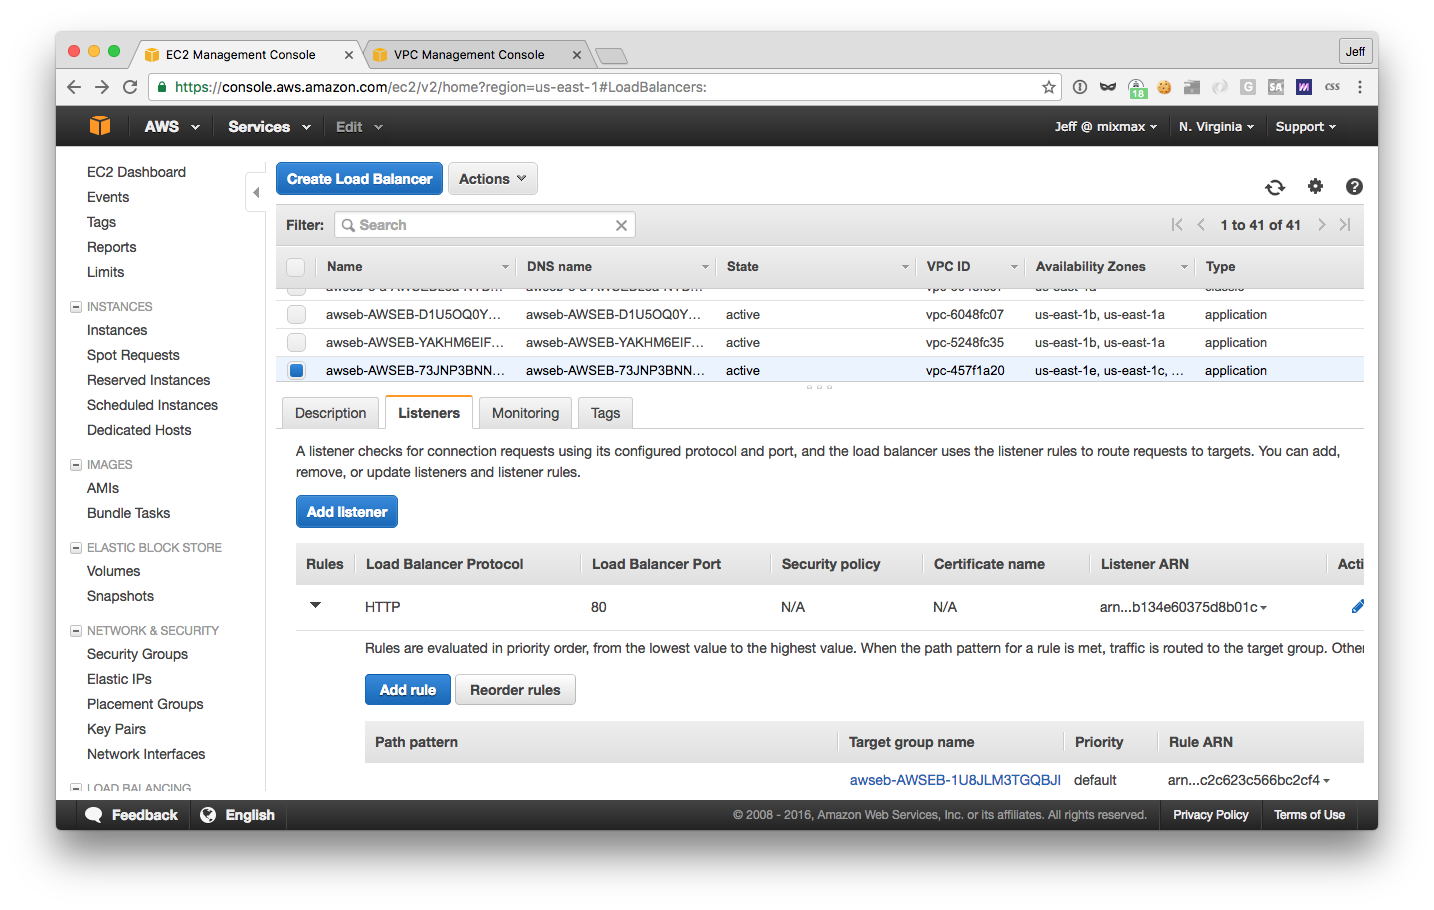
The first tell (in the load balancer table above) is that the “type” of the balancer is “application”. Secondly, you can look at the “Created At” date. And if all else fails, you can switch over to the “Listeners” tab of the balancer and click the name of the target group of the HTTP listener:
Then, in the target group’s “Targets” tab, you’ll be able to match the name of the EB environment (highlighted):
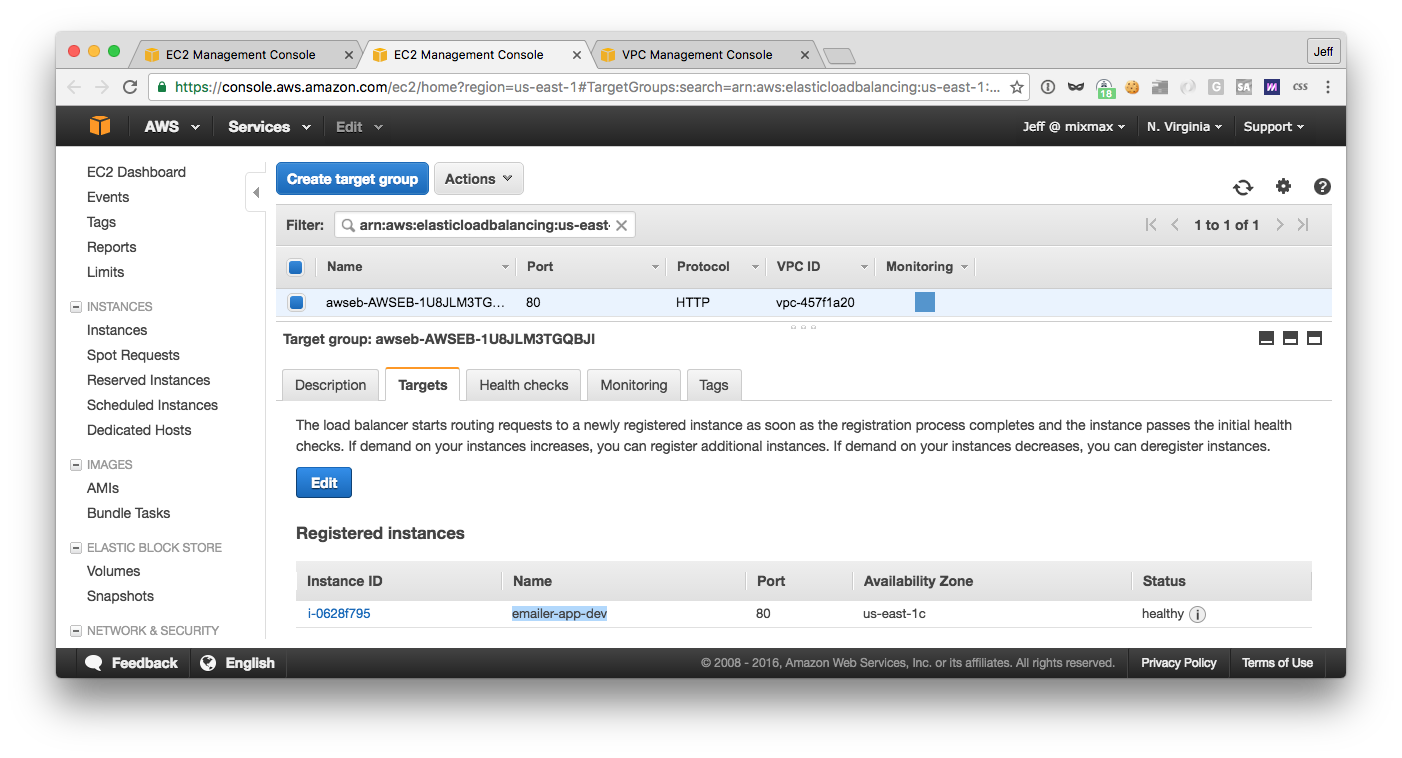
Navigate to this target group if you haven’t already, since it’s here that you’ll need to enable cookie-based stickiness (at the bottom of the “Description” tab) and configure the health check (in the “Health checks” tab). Note that there’s also a health check URL section in the EB dashboard:
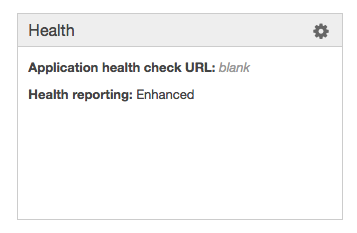
but this doesn’t do anything. (In an environment using an ELB, it synchronizes with the ELB’s settings; presumably AWS will do this for environments using ALBs too at some point.)
Lastly, go back to the load balancer and add an HTTPS listener:
This assumes you’ve already registered your SSL certificate with AWS.
(Aside: you don’t need a TCP listener because, unlike the ELB, the ALB actually supports websockets, which begin over HTTP(S). And the ALB doesn’t even support TCP listeners, as it load-balances only at Layer 7.)
Phew, that’s the ALB all set up.
Configuring nginx
This section applies to any EB environment that uses nginx as an application proxy server. This is the default for EB environments that use Node.js as their platform, and is required to support static file mappings and gzip compression (at least out of the box on EB).
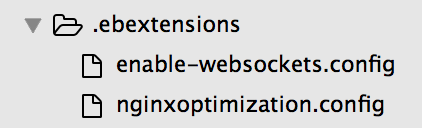
Unfortunately but perhaps unsurprisingly (at this early stage), EB’s default nginx configuration does not support websockets. You’ll need to patch its configuration to handle the HTTP upgrade request using an ebextensions script like this:
|
Careful, a failure to enable the upgrade may go unnoticed if you’re using a websocket emulation like SockJS — it’ll just fall back to XHR or JSONP.
We have also found that our application requires a greater number of worker connections than the default. You could increase the limit by patching EB’s configuration as above, using sed; we did it by simply copying EB’s configuration and editing the relevant line.
So put both those files into an .ebextensions directory in your application’s root directory:
Configuring Cloudwatch alarms
This section applies to any use of an ALB with Elastic Beanstalk.
Configuring Cloudwatch alarms is mostly out of the scope of this article. However, you should note that ALBs have a different set of Cloudwatch metrics than ELBs do. Compare:
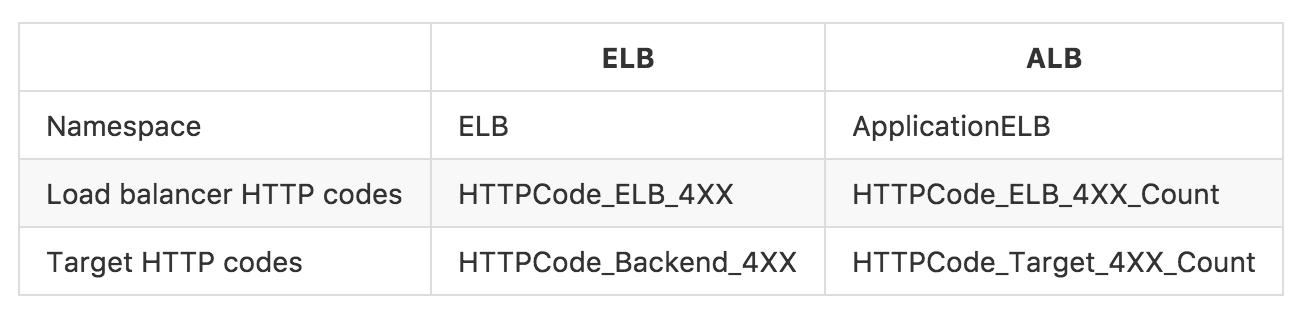
Perhaps at some point AWS will rename the ALB metrics to remove references to “ELB”.
Deploying Meteor to Elastic Beanstalk
Up until this point-perhaps because of the AWS configuration required-most tutorials for deploying Meteor to Elastic Beanstalk have been rather fragmentary. This post is probably the most complete but involves the author doing a lot of unnecessary manual work and also doesn’t enable websockets.
For these reasons, many Meteor apps deploy onto PaaSes such as Modulus.io and Meteor’s own Galaxy. (Mixmax used both of those options, Galaxy most recently, before switching to EB.) But this article will hopefully convey that it is now simple to use EB to realize cost savings and control beyond what non-EB PaaSes can provide.
So, here is a simple, complete, and automated guide to deploying Meteor to Elastic Beanstalk.
First, configure an EB environment using an ALB, with websockets enabled, as earlier in this post. When your environment launches, Beanstalk will complain that it is unhealthy. Don’t worry! This is because EB is trying to run your Meteor application as if it were a regular Node.js application, using npm start.
To deploy Meteor to Elastic Beanstalk, you have to turn it into a regular Node.js application. Luckily, Meteor offers a CLI command for this, meteor build. It outputs a “bundle” directory containing a script main.js which will start the application. So fill in your EB environment’s “Configuration -> Software Configuration” dashboard like so:

(Note: EB will restart your environment every time you save a configuration change, and your environment will keep being unhealthy until it is fully configured and deployed, so this process is somewhat slow and may involve EB rolling back. It would be more efficient to enact all changes in an ebextension config file so that they could be deployed alongside your application.)
Also in the Software Configuration dashboard, set the standard Meteor environment variables of ROOT_URL and MONGO_URL. Unfortunately, you won’t be able to set METEOR_SETTINGS to the contents of your Meteor settings file, as Meteor recommends when using bundles — EB doesn’t let you put JSON in an environment variable.
You might consider switching to use individual environment variables now that you’re on a PaaS that supports such (cough Galaxy cough). Alternatively, if you wish to keep using Meteor settings, you can patch main.js to load your settings (see script below).
The last part of converting Meteor to a regular Node.js application is installing your dependencies. The way meteor build works is that it copies your currently-installed Node modules into the bundle and flags native modules to be rebuilt when npm install is run on the target server. That is, rebuilding is all that npm install does on the target server. (This is kinda cool actually — it makes deployment faster and more consistent with your local environment.)
But, you can’t run npm install at the root of your application, you have to run it within the bundle. So, copy this script into your ebextensions directory to do that during deployment.
Altogether now, here is a script that fully deploys your Meteor application to Elastic Beanstalk: it
- installs Node modules
- bundles your Meteor application as a Node.js application
- copies your
ebextensionsinto the bundle - copies your Meteor settings into the bundle and patches
main.jsto load them - and finally deploys the bundle to EB.
Conclusion
This post has shown that it is now possible to deploy websocket-using applications like Meteor to AWS Elastic Beanstalk using native AWS resources, thus reaping all the advantages of EB—high availability, scalability, and low cost—without committing substantial devops time. Configuring the new Application Load Balancer is laborious at the moment, but will only become easier as Elastic Beanstalk builds out automation and GUIs for doing so. And adopting Elastic Beanstalk now puts applications like Mixmax in the perfect position to scale while giving us control over our platform.
Tweet at us @MixmaxHQ with your opinions on deploying with AWS vs other PaaS/IaaS offerings. And if you’d like to deploy cutting edge infrastructure to a global user base, drop us a line at careers@mixmax.com.